
 Coaxial Cable Assembly
 Microwave Test Cable
 Coaxial RF Connector
 Coaxial RF Adapter
 Coaxial RF Termination
 Coaxial RF Test Probe
 Coaxial RF Attenuator
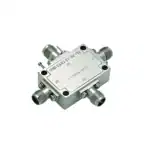 RF Switches
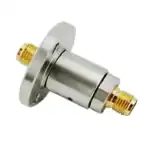 Rotary Joints
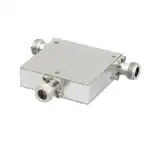 RF Circulators
 Coaxial RF Power Dividers
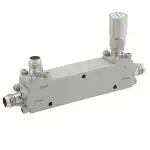 RF Couplers
 RF Filters
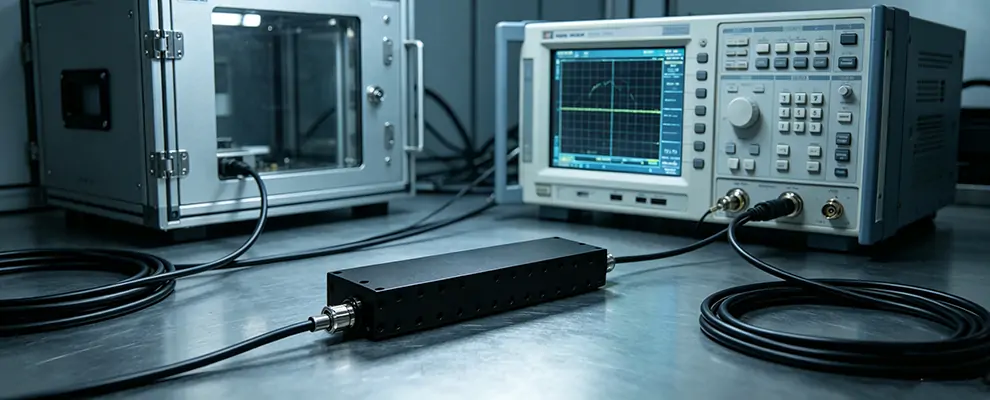
Have you ever encountered this: your receiver’s noise floor suddenly jumps 15–20 dB, and on the spectrum analyzer there’s a distinct interference spike. After checking everything—antenna isolation maximized, shielding added—it’s still there.
At this point, the last line of defense is a Band Rejection Filter (also called a Notch Filter)—designed to notch out a specific frequency band, suppressing the interference while letting your wanted signal in the pass band pass through with near-zero loss.
But using the wrong filter can make things worse. Insertion loss eats into your link budget, temperature drift causes the notch to shift off the intended frequency, and exceeding the power rating can destroy the filter. This article gives you a complete decision process: whether you need one, how to select it, and how to install it properly.
First: Do You Actually Need a Band Rejection Filter?
A band rejection filter is the last resort, not the first step. Confirm these three points before proceeding:
- Is the noise floor rise concentrated in one specific band?
Look at the spectrum analyzer. If the entire noise floor rises uniformly, it’s likely amplifier self-oscillation or power supply noise—a band rejection filter won’t help. Only a distinct interference peak warrants consideration.
- Have you pushed antenna isolation and front-end filtering to the limit?
Try adjusting antenna direction, adding shielding, or upgrading to a bandpass filter with higher rejection. If all measures are exhausted and the problem persists, then consider a band rejection filter.
- Is there adequate guard band between the interference and your wanted signal?
Typically you need ≥20 MHz. For example, if your wanted signal is 2110–2170 MHz and the interference is at 1805–1880 MHz, you have a comfortable 130 MHz guard band. If the interference and wanted signal are only 5–10 MHz apart, using a band rejection filter carries risk—consider a bandpass filter instead.
Conclusion: All three points satisfied → proceed with a band rejection filter. Any uncertainty → go back and troubleshoot the system first.
How Much Rejection Depth to Choose? — Don’t Guess
Many people casually buy a ’40 dB’ filter and find out it’s still not enough. Rejection depth needs to be calculated.
Calculation Formula:
Required rejection depth = Interference signal power (dBm) − Receiver noise floor (dBm) + 10 dB margin
Example: Spectrum analyzer shows interference at -30 dBm, receiver noise floor at -110 dBm. Plug in the formula:
-30 − (-110) + 10 = 90 dB
This requires a filter with ≥90 dB rejection. Typical cavity band rejection filters achieve 40–60 dB; achieving 90 dB requires cascading two stages, which doubles the size and cost.
Quick Selection Table:
Interference Level | Recommended Rejection |
Above -30 dBm | ≥60 dB |
-30 to -50 dBm | 40–60 dB |
Below -50 dBm | 40 dB |
Two Critical Reminders:
- When interference is strong (> -20 dBm), don’t place the band rejection filter directly between the interference source and receiver. Add a 10–20 dB fixed attenuator first to bring the power below the filter’s rated input. Otherwise, intermodulation products or saturation will occur.
- The practical limit for cavity band rejection is 60 dB (dual-cavity); higher rejection comes with abruptly increasing cost. If your calculation shows you need >60 dB, consider eliminating the interference at the source (change frequency, add shielding) rather than relying on the filter.
Pass-Band Insertion Loss — How Much Link Budget Does It Eat?
The filter is inserted in series in your signal chain. Insertion loss directly reduces your wanted signal power.
Quick Estimate:
Typical cavity band rejection insertion loss: 1.5–2.5 dB (see the parameter table). Compare: Without the filter, interference raises the noise floor by 20 dB, degrading sensitivity by 20 dB. Conclusion: 2 dB insertion loss for 20 dB sensitivity improvement = 18 dB net gain. The math works.
Three Things to Watch:
- Actual insertion loss is often lower than spec. The datasheet states ‘≤2 dB maximum in pass band,’ but at your specific frequency it may only be 0.8–1.2 dB. Ask the supplier for S-parameter curves.
- VSWR reflection also eats link budget. VSWR ≤1.5:1 corresponds to return loss ≥14 dB, reflected power <4%, negligible. But if VSWR >2:1, reflected power reaches 11%—check if connectors are loose or the filter is damaged.
- Insertion loss adds up with cascaded filters. If your system already has a bandpass filter plus a band rejection filter, both losses add up. Calculate whether your link margin can handle it.
Temperature Drift — Will the Notch Frequency Shift?
Filters are made of metal cavities, which expand and contract with temperature. The notch center frequency shifts with temperature.
How Big Is the Problem?
Typical temperature drift: ±50 ppm/°C (cavity construction). ZOMWAVE full series operating temperature: -45 to +85°C (130°C span). Take 1805–1880 MHz as example: 130°C × 50 ppm = ±0.65% ≈ ±12 MHz.
Meaning: at room temperature the center is 1842.5 MHz; at +85°C it may shift to 1854 MHz, and at -45°C to 1830 MHz.
Engineering Solutions:
- Check if your guard band is sufficient. For the 1805–1880 MHz band, the pass band spans DC–1780 MHz (lower guard band 25 MHz) and 1905–5000 MHz (upper guard band 70 MHz). Even at extreme temperature (±12 MHz), the wanted signal is still in the guard band—no problem.
- Three solutions:
- Choose a lower-drift model: Some premium models use Invar alloy, achieving ±20 ppm/°C, but costing 3–5× more.
- Use a tunable band rejection filter: Some ZOMWAVE models support mechanical fine-tuning—install, measure the actual frequency, then adjust.
- Relax the rejection requirement: Allow slightly lower rejection at extreme temperatures (e.g., drop from 50 dB to 40 dB), as long as the interference peak is still suppressed.
- Install away from heat sources. Don’t mount the filter near PA (high-power amplifier) or power supply modules—those devices can have local temperature rises exceeding 50°C, pushing the filter’s actual operating temperature far above ambient.
Practical Installation — 3 Common Pitfalls
Pitfall 1: Power Derating
The datasheet’s ’50W CW @25°C’ is for room temperature only. Allowable power decreases as temperature rises:
Ambient Temperature | Derating Factor |
25°C | 100% |
45°C | 85% |
65°C | 70% |
85°C | 50% |
If you run 50W in a 65°C environment, you’ve actually exceeded the derated limit (50W × 70% = 35W)—long-term use will degrade performance or cause failure.
Recommendation: Use the 10W or 20W model for receiver-side installation; use the 50W model for transmitter front-end, and ensure ambient temperature stays below 45°C.
Pitfall 2: Connector Torque
Hand-tightening SMA connectors won’t achieve proper torque → VSWR can jump from 1.2 to 3.0+, effectively negating the filter. Overtightening damages the threads.
Recommended torque: 0.9–1.1 N·m (≈ 8–10 kgf·cm). Hand-tightening can’t achieve this—you need a torque wrench. Each disassembly/reassembly wears the connector’s spring fingers; recommend replacing the nut after 3–5 cycles.
Pitfall 3: Poor Cavity Grounding
The filter housing must have solid ground connection. Loose screws or oxidized grounding pads can reduce shielding effectiveness by 10–20 dB—leaking interference right through the gap.
Check: Use a multimeter to measure resistance from the housing to earth (equipment cabinet); should be <0.1 Ω. If >1 Ω, grounding is poor.
ZOMWAVE Cavity Band Rejection Filter Full Lineup
Part Number | Stop Band (MHz) | Rejection (dB) | Power (W) | Insertion Loss (dB) | VSWR | Pass Band (Low) (MHz) | Pass Band (High) (MHz) | Dimensions (mm) | Price (1+) ($) |
BRF-758-803BRF-758-803 | 758–803 MHz | 60 dB | 10W | ≤1.5 dB | ≤1.7 | DC–735 MHz | 849–2300 MHz | 265×80×28 | $850 |
BRF-791-821BRF-791-821 | 791–821 MHz | 50 dB | 50W | ≤1.5 dB | ≤1.7 | DC–773 MHz | 839–2500 MHz | 239×95×28 | $850 |
BRF-869-894BRF-869-894 | 869–894 MHz | 40 dB | 50W | ≤2 dB | ≤1.7 | DC–849 MHz | 914–2600 MHz | 221×92×28 | $850 |
BRF-1805-1880BRF-1805-1880 | 1805–1880 MHz | 50 dB | 50W | ≤2 dB | ≤1.5 | DC–1780 MHz | 1905–5000 MHz | 225×53×22 | $800 |
BRF-2110-2170BRF-2110-2170 | 2110–2170 MHz | 50 dB | 50W | ≤2 dB | ≤1.5 | DC–2085 MHz | 2195–5500 MHz | 185×51×22 | $783 |
BRF-2300-2400BRF-2300-2400 | 2300–2400 MHz | 60 dB | 30W | ≤1.5 dB | ≤1.5 | DC–2260 MHz | 2440–6200 MHz | 209×47×22 | $817 |
BRF-2496-2690BRF-2496-2690 | 2496–2690 MHz | 50 dB | 20W | ≤2 dB | ≤1.5 | DC–2436 MHz | 2750–7100 MHz | 173×40×18 | $783 |
BRF-3300-3800BRF-3300-3800 | 3300–3800 MHz | 45 dB | 10W | ≤2.5 dB | ≤1.7 | DC–3180 MHz | 3920–8000 MHz | 141×40×16 | $767 |
Click on the Part Number to view the product detail page.
Conclusion
If your interference frequency isn’t in the table above (e.g., you need to suppress 2.6–2.9 GHz WiMax interference, or require a custom notch width), contact ZOMWAVE directly for customization services.